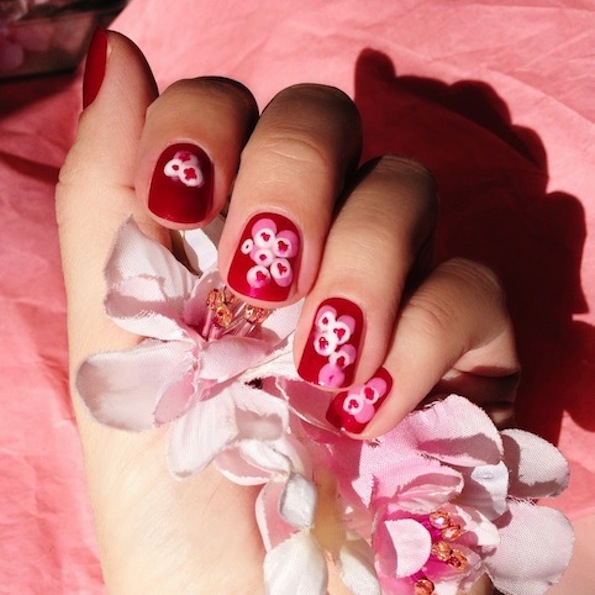
How to… Create a Simple Cherry Blossom Manicure
You can find numerous really nice cherry blossom manicures. Admirably worthy… but that’s all. You need far too much time to create such manicure, specific instruments and really skilful hands. You can admire and copy mine, as it is created quickly, easily and with equipment taken out of the kitchen drawer.
YOU NEED
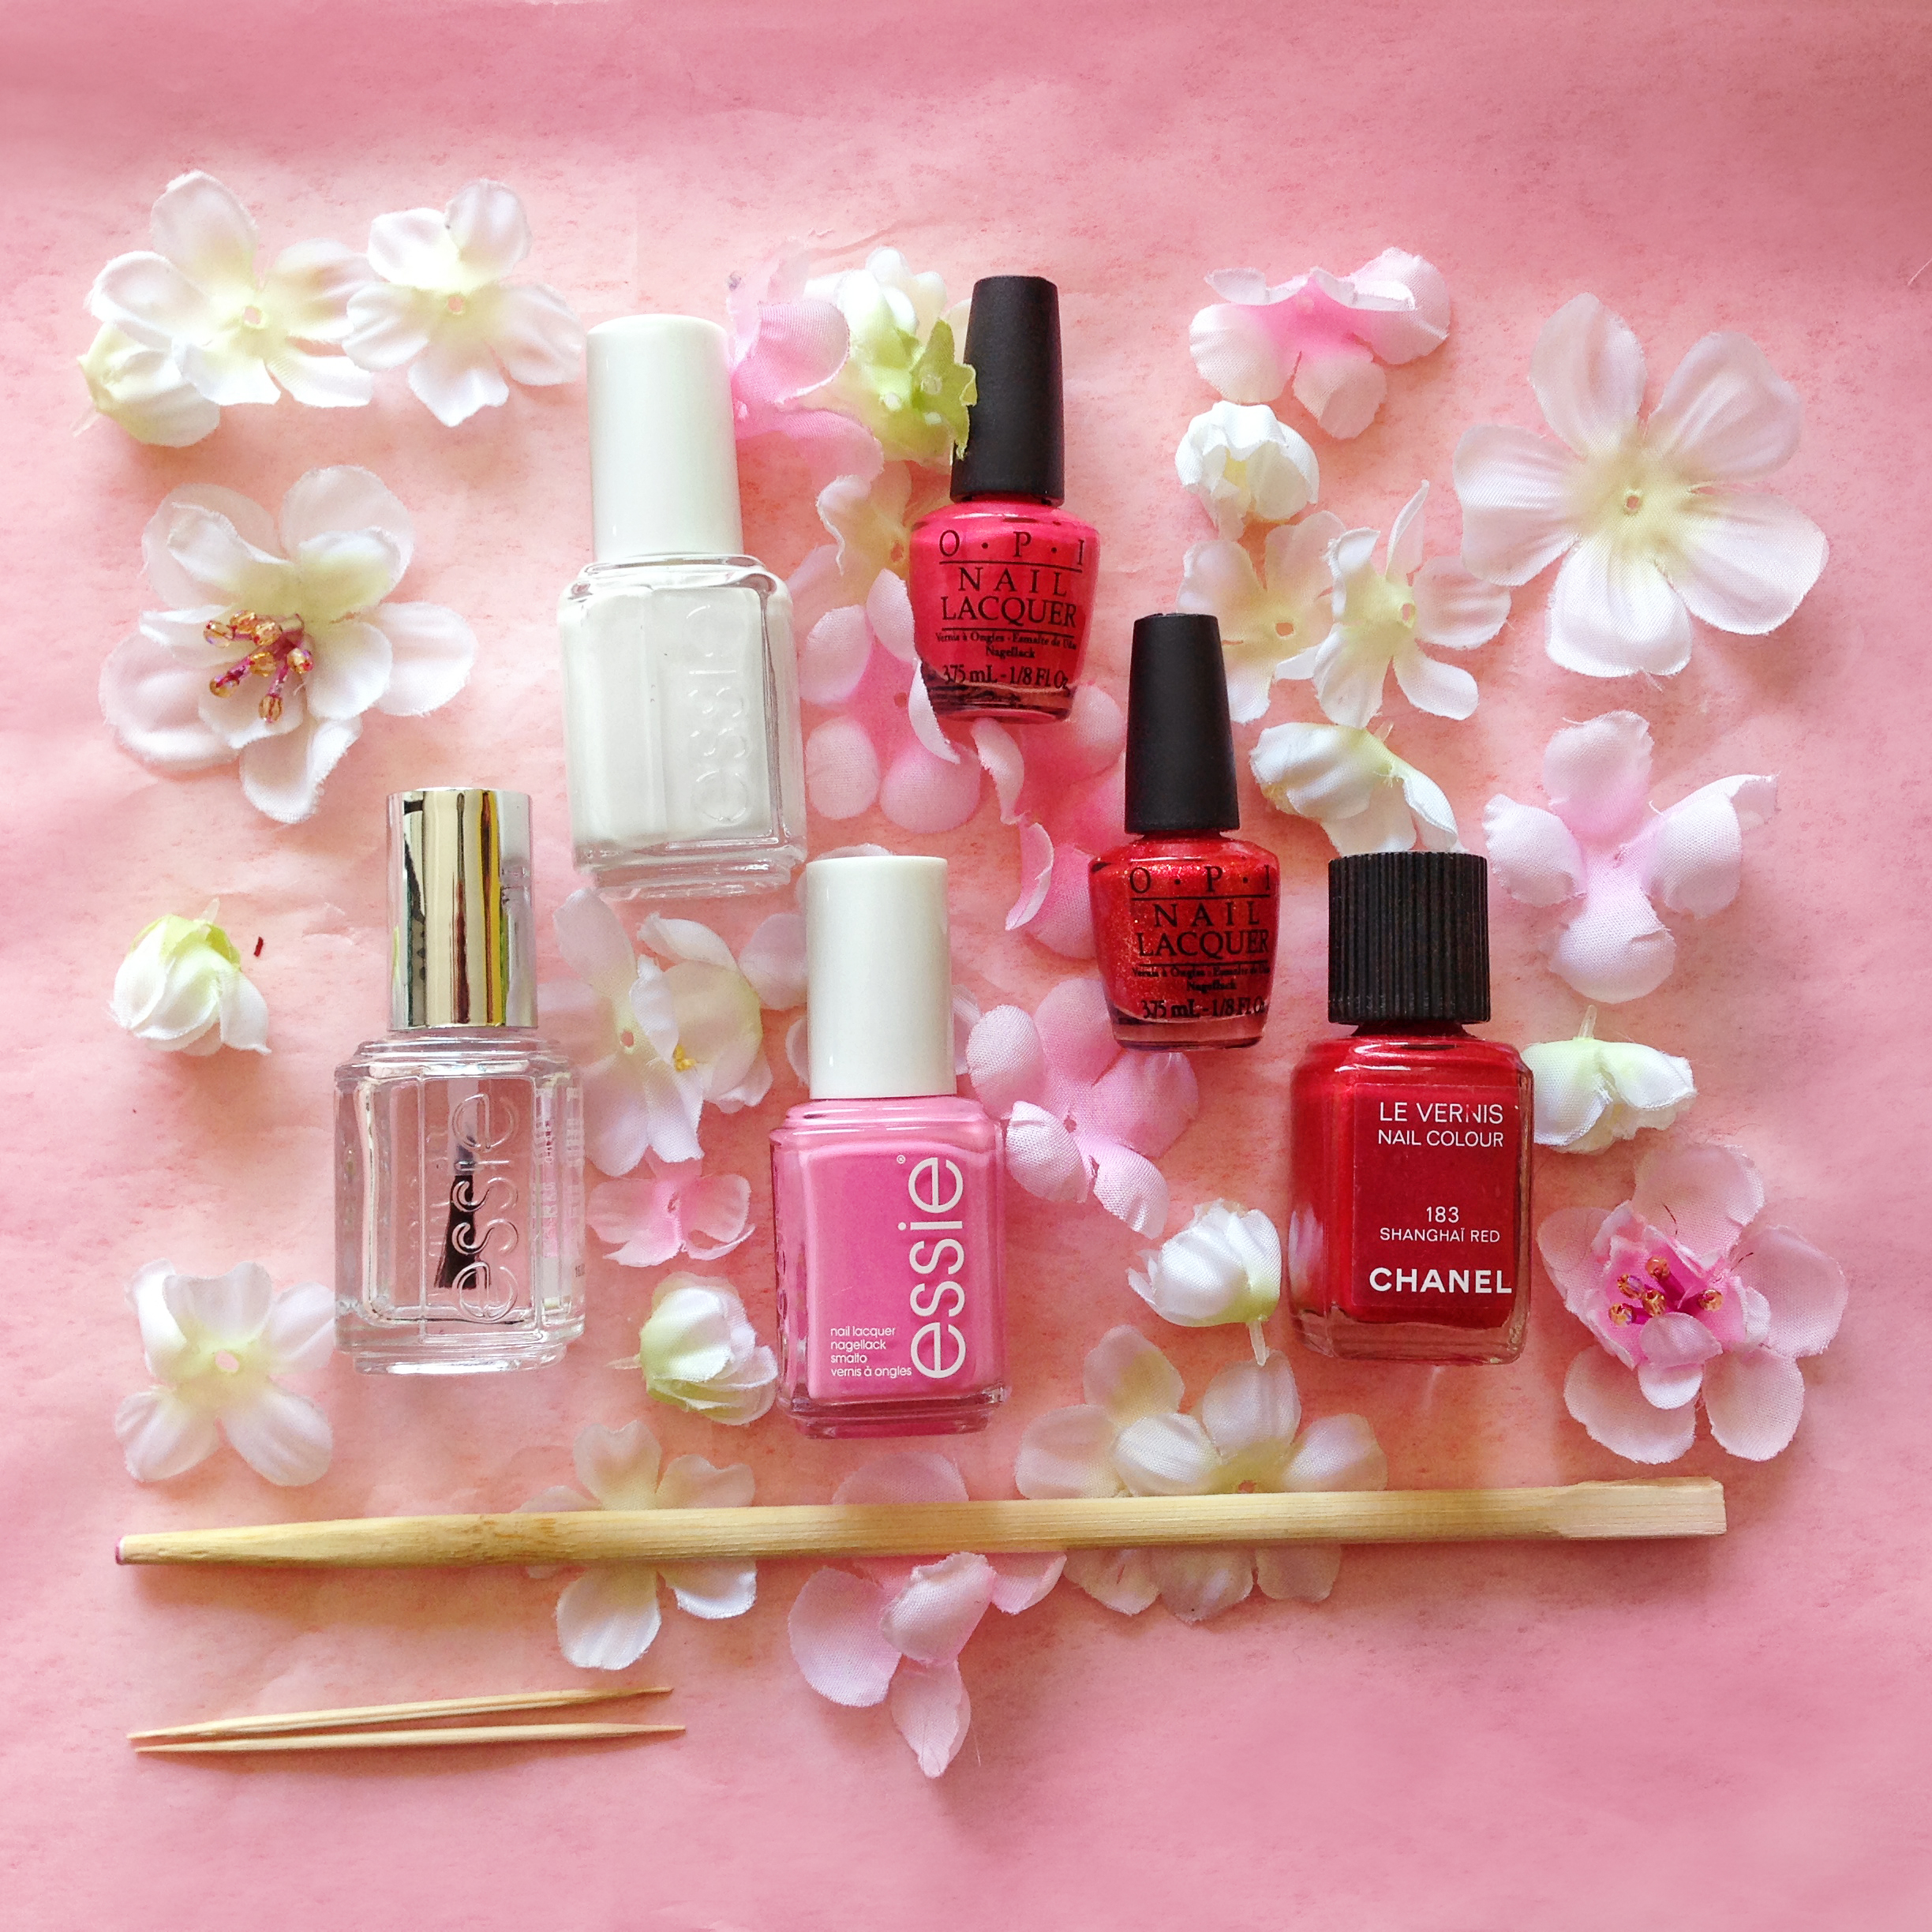
- Base coat, e.g. Chanel Le Vernis red, 183/Shanghai Red.
- Nail polishers in the colours of cherry blossoms. I used Essie, 1/Blanc shade (white) and 20/Lovie Dovi (pink).
- Nail polisher with glitter or sand version for the stamen. OPI, Magazine Cover Mouse looks nice.
- Drops or spray for fast drying of the manicure. Essie Good To Go is a good one.
- Chopstick… or two, if they are of different thicknesses
- Toothpick
Procedure:
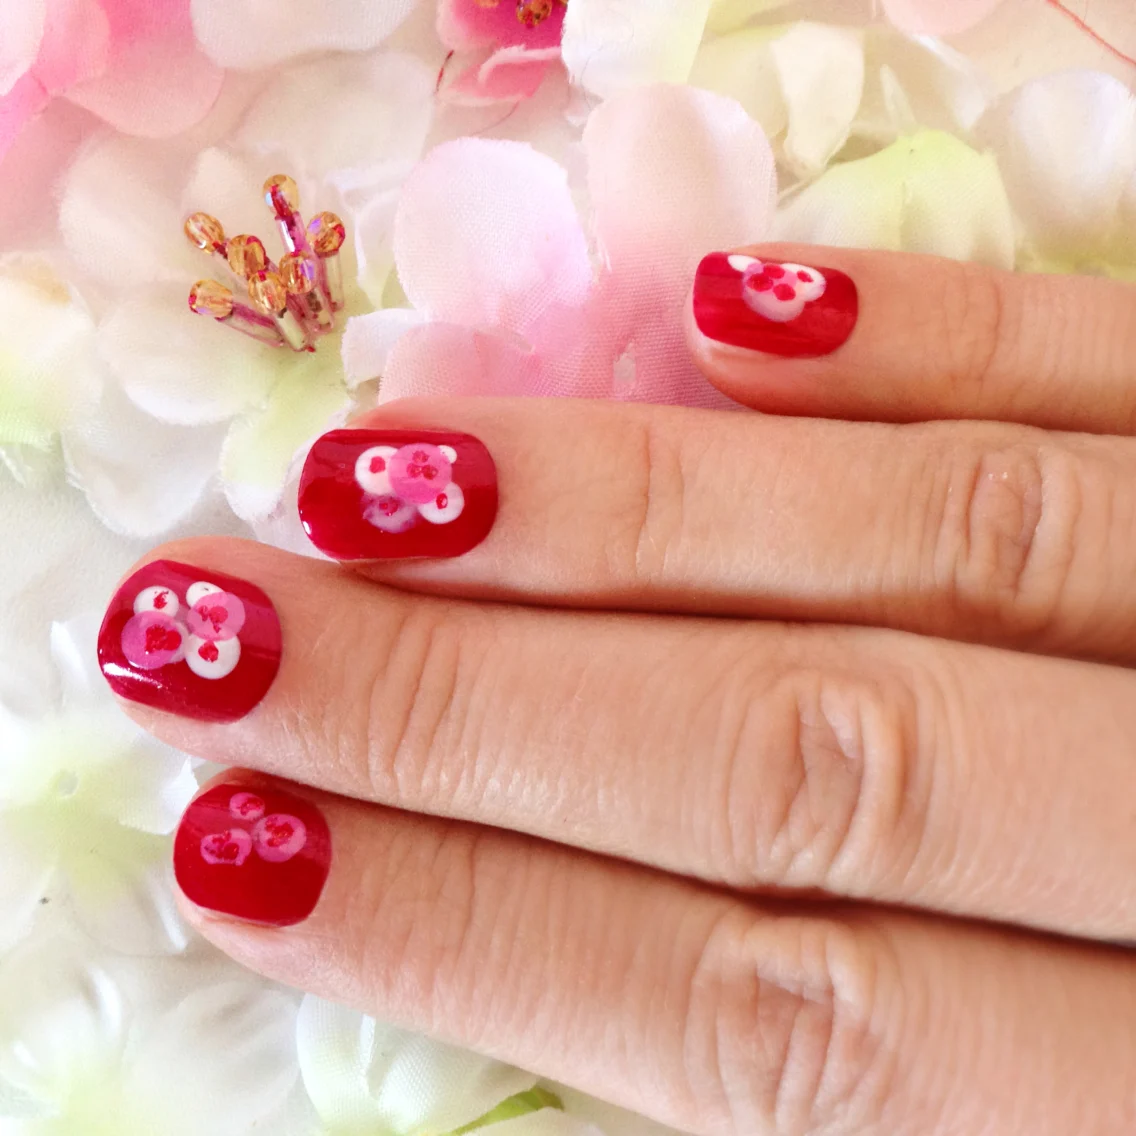
Varnish your nails with a layer of red nail polisher. Wait for the coat to dry completely. Dab the chopstick into a pink nail polisher and print dots on the red base.
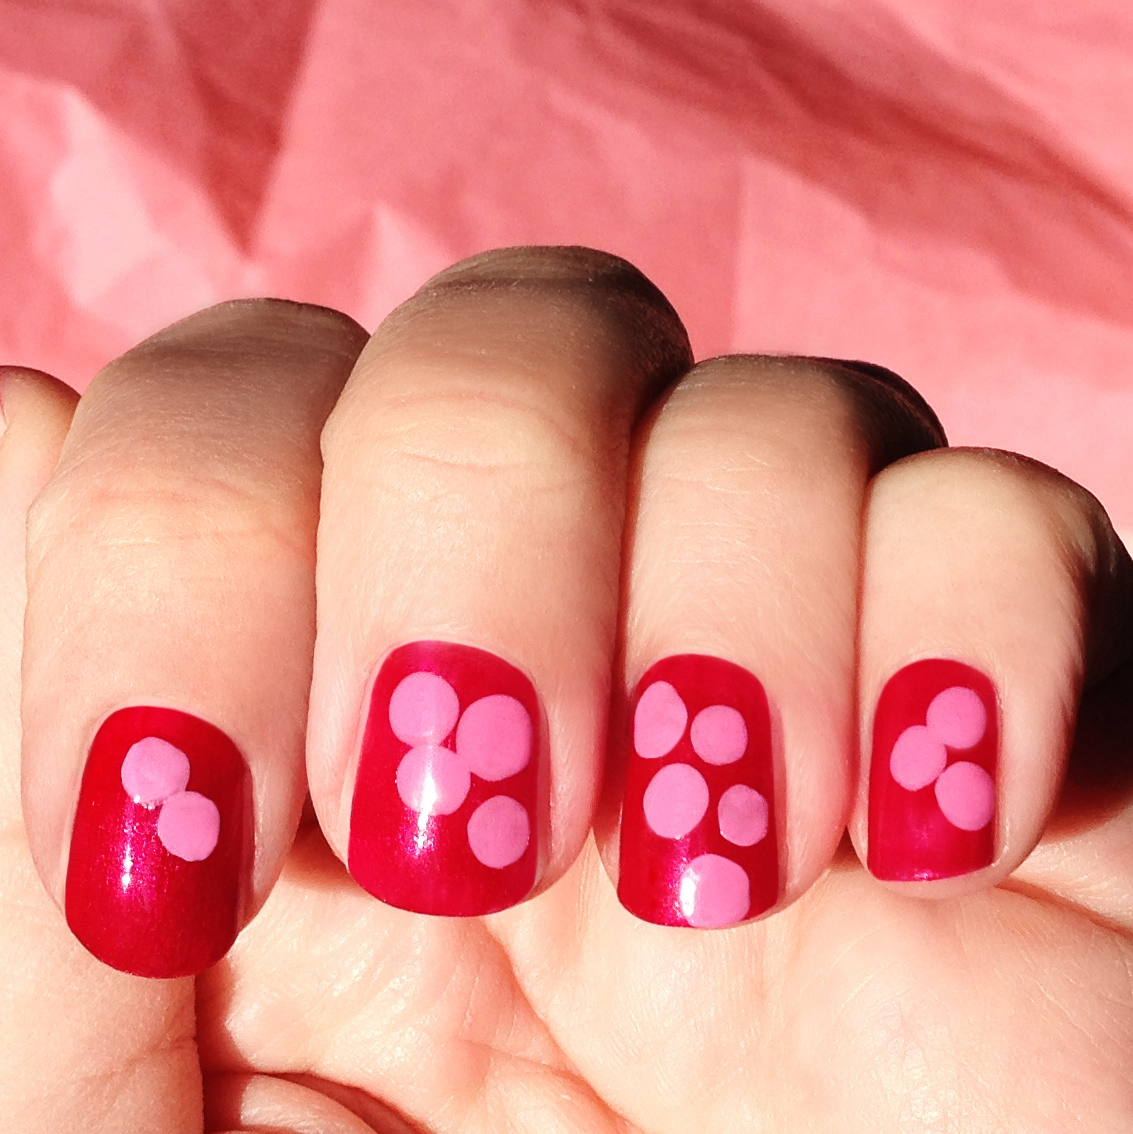
Again, wait for it to dry, then apply the white nail-polisher. If you have two chopsticks, pick the one with the smaller diameter.
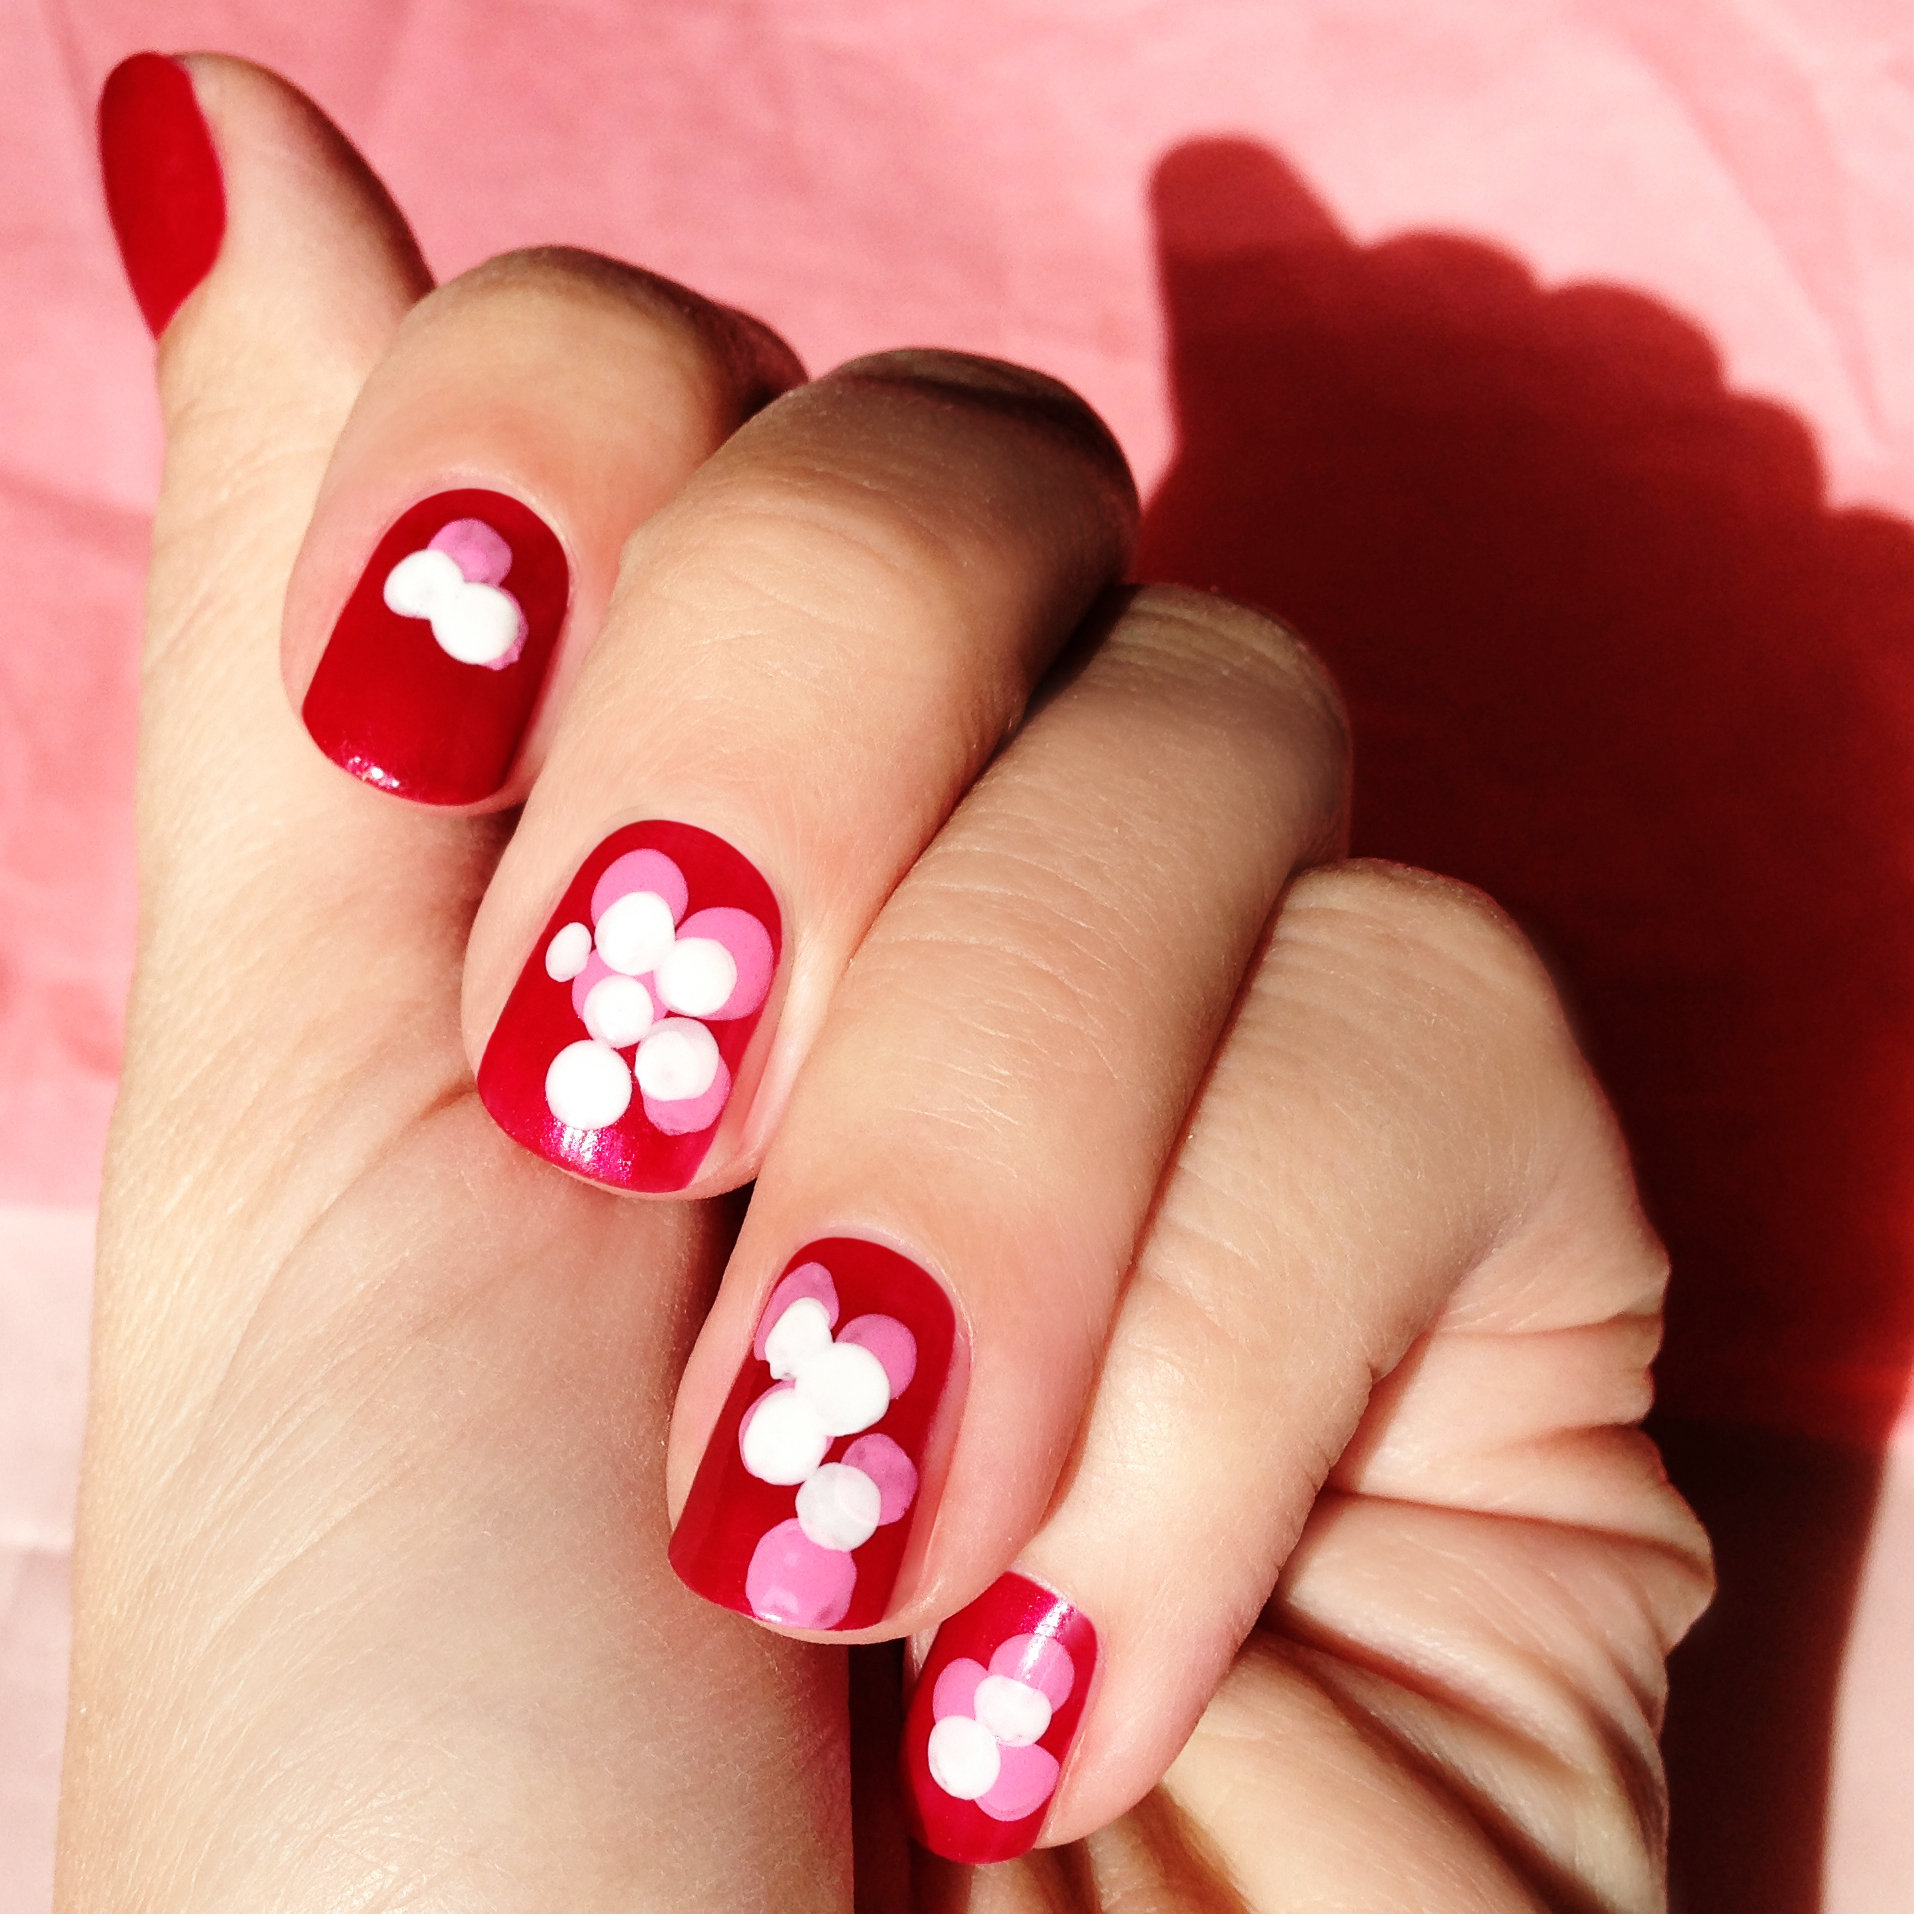
You should create dots looking like flowers. When the white and pink coat completely dry out, dab a toothpick into the shiny red paint and print small dots in the middle of the flowers, which will form a flower pollen impression.
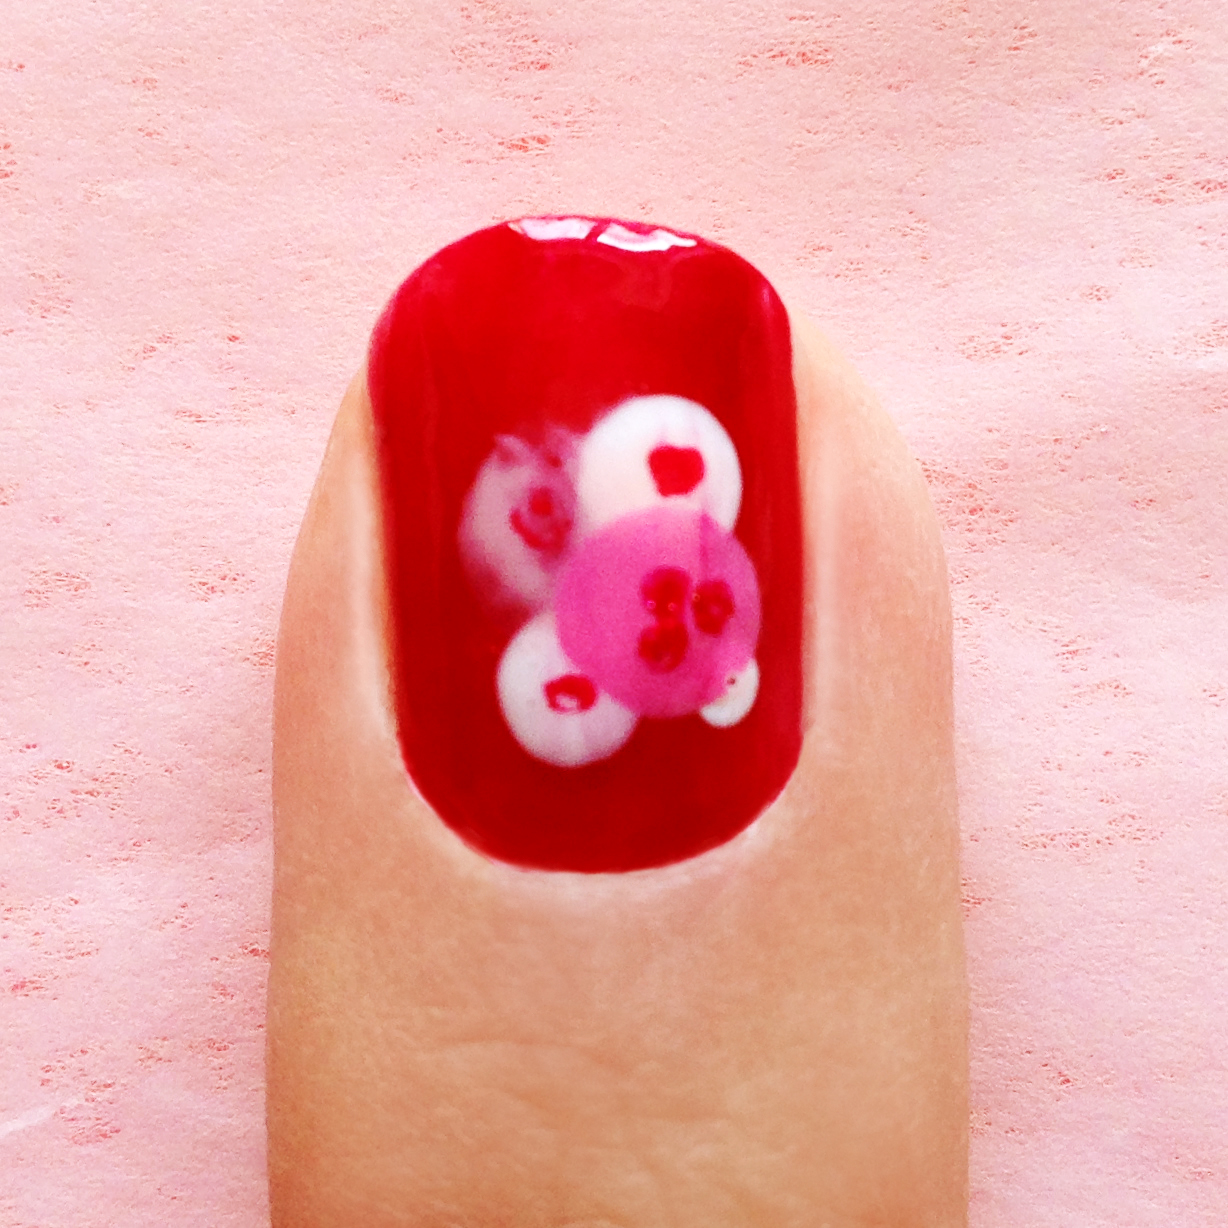
Wait until they’re fairly dry, then apply the product for quick drying. Otherwise, the red dots in the middle will smudge into small lines, just like in my case :(… Next time, I will try to better control my impatience causing the immediate posting of the article online ;).
Sorodne vsebine

This post is also available in: