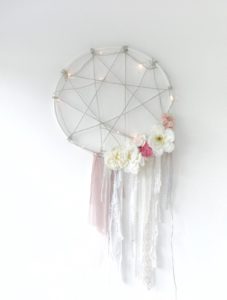
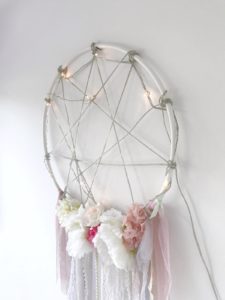
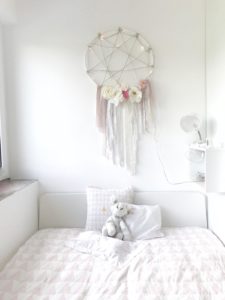
DIY: DREAM CATCHER LIGHT
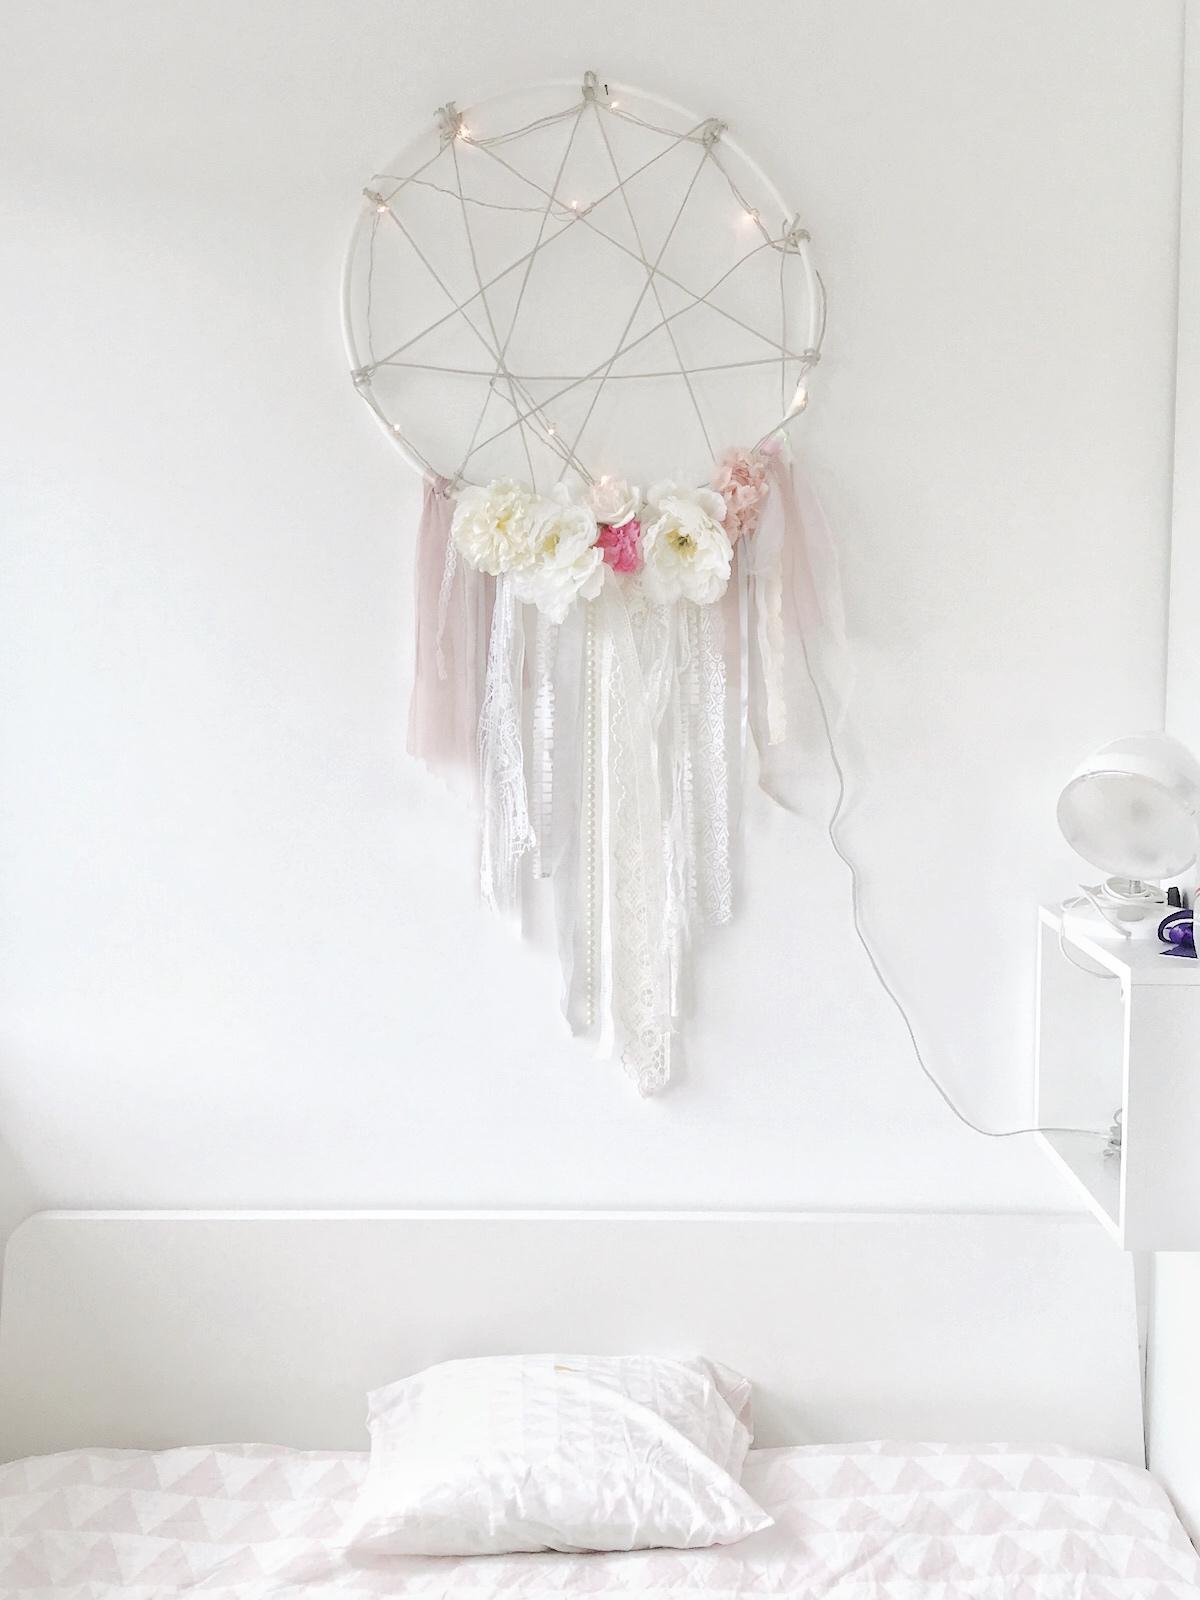
If you have an extra ring and New Year’s lights, you can quickly and easily create a dream catcher, which can also be used as an ambient light. Every girl will be happy to have it, especially if it’s decorated with lace, pearls and beautiful flowers.
YOU CAN CAN EASILY MAKE THIS DREAM CATCHER YOURSELF FOLLOWING THIS STEPS
Production time (without preparation): 45 min
YOU NEED:
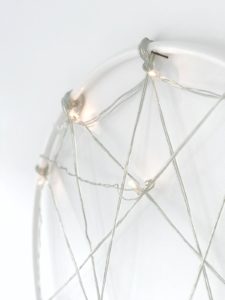
- large circle; it can be a ring (a smaller hoolahop) or a circumference of the net against mosquitoes,
- light, it can be New Year’s, but it’s more beautiful if the cable is white and not green, so I prefer to find the decorative, I used the old Ikea’s Skina lights, and removed them from the plastic flowers,
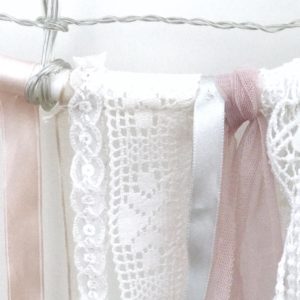
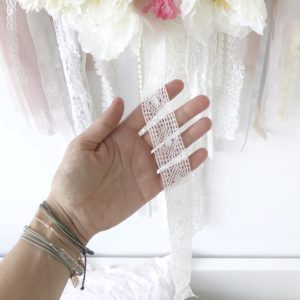
- several different tapes; lace, beads, necklaces, laces, silk ribbons, twine, craps, wool …,
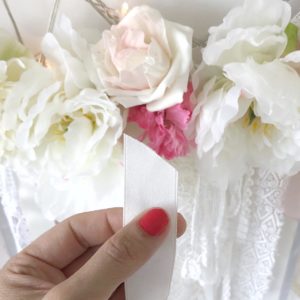
- 7 artificial flowers, you can also use pens, sticks, beads …
- nail and hammer which you can use to hang the light of the dream catcher.
PROCESS
Make sure the circle is really round and if it is not, look where it would be most beautiful, that the tip (the circumference of the mosquito net was slightly elliptical).
Determinate how much of the light cable you need so that you can plug the dream catcher into electricity.
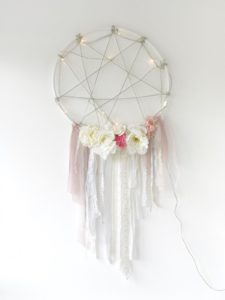
Wrap the other part of the cable around the circumference of the circle so that a starburst is formed. It’s easier if somebody helps you to set a good pattern.
Bind the straps or sew around the lower part of the circle. Shorten them so that they are the same lenght, or so that the straps towards the center are longer.
Then on top of the tracks or at the rim of the circle, add the flowers.
Stab the nail and hang the light of a dreamer on it.


STOP GAME
It’s nice to decorate the dream catcher with feathers, but there must be a lot of them.
Amalja and I used ribbons and lace that her grandmother gave her, which we saved for a long time, but never found the right clothes to decorate it with. This time, it seemed to us that the opportunity was right and that lace would be even more admired. Since we did not want to shrink them too much, the shape of the bandage strip is not the finest in the end, and it might be better to slightly turn around the light so that the strips and flowers position to the right bottom (the last picture).
Do you like it? Did you make something like that yourself? I’m looking forward to your comment, thank you.
Shine bright,
Nika
♥ Klikni in me sledi tudi na Instagramu ♥
* Photo: Beautyfull Blog
bedroom decorDIYDIY dream catcherhome decor
Sorodne vsebine

This post is also available in: Slovenian